
The first thing you need to know about a Holga is that this is not a normal camera. If you try to use it like one, you will be sorely disappointed. It has virtually no settings. It has one aperture, which by a very rough approximation is f13, and the non-adjustable shutter speed is around 1/100 of a second. Again, a rough guess.
For those of you not familiar with camera lingo, the layman’s summary is that the Holga is an outdoor, bright light camera. If you try to use this camera indoors or in an area where there isn’t much light, you won’t get a photo. So limit yourself to using the Holga in settings with lots of light during the daytime or light cloud cover and you’ll get good results.
Now that we know when to use the camera, let’s get it set up. First thing to do is load it with some film. There are three broad categories of film:
- Black and white (e.g. Ilford HP5+, Kodak Tri-X)
- Color negative (Kodak Portra 400, Fuji Superia)
- Slide (Fuji Velvia)
Any kind of 120 size film will do, but I recommend either black and white or color negative film, both in a 400 speed. Both of these film types have a large margin of error when it comes to lighting conditions, so even if you shoot when it’s either a little too bright or a little too dark, you’ll still get a usable photo. Perfect for the type of camera we’re going to be using. Slide film on the other hand is very unforgiving. For the photo to turn out right, your exposure settings need to be spot on. You will not get this level of precision with a Holga. I’ve tried shooting Velvia many times and have been consistently disappointed with the results. Save yourself the trouble and just stick to either B&W or color negative.
Once you have your film, you need to load it. Open up the back of the Holga by sliding the metal clips on either side of the camera. The back will pop off.

There’s a film spool on the left side inside the camera (when I say left and right over the next few paragraphs, the orientation is as you look at the backside of the camera). Pull it out, bottom end first and insert it into the right side which has the winding knob. Set all of this aside for a minute and get your medium format film.
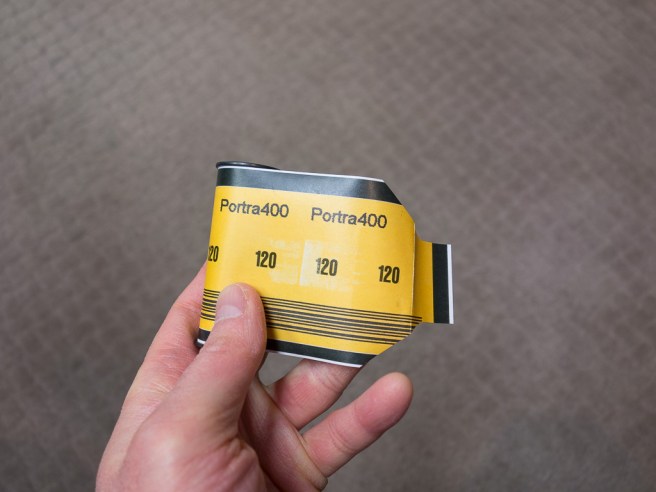
Break the seal and unroll a few inches of the film as shown above. That smaller nub is the part that you’ll now insert into your empty spool that’s already in the right side of the Holga. Once it’s secure, put the roll of film in the left side of the Holga so it looks like this:

Before you go any further, take a small piece of cardboard (easiest thing to do is cut a piece from the box that the film came in) and fold it over once or twice into a little square like so:
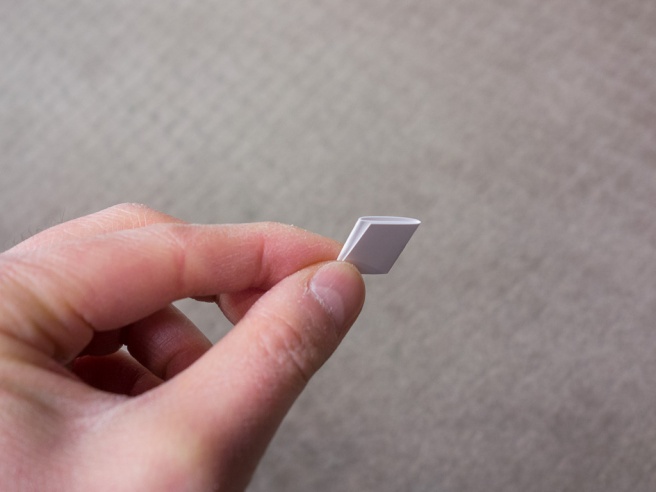
Take this piece of paper and shove it into the narrow space underneath the roll of film. It’s indicated by the red arrow:
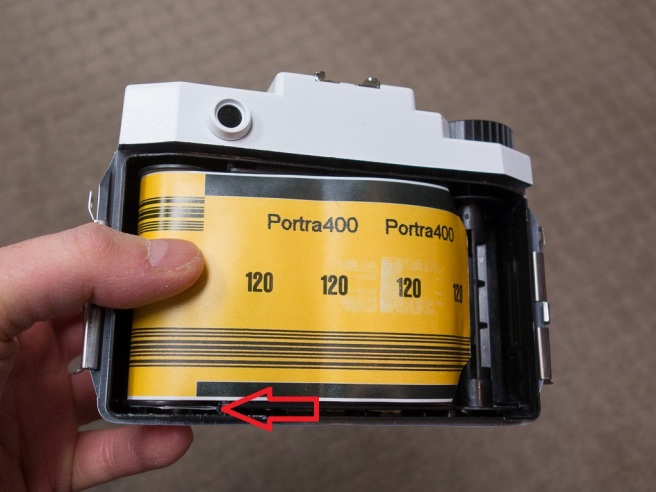
You want this piece of cardboard to be thick enough to provide some tension to the film roll, but not so tight that you can’t wind the film. It may take some experimentation. Once it’s set up, use the knob on the top of the camera to start winding the film. It should wind pretty easily, but the film between the two spools should be nice and taut. If there’s any slackness, then your piece of cardboard isn’t thick enough and the film will be loose, which will mess up your photos.
After you’ve wound a little bit of the film, take the plastic back and snap it back on to the camera.

Once the camera is back to one piece, make sure the arrow on the rear is in the down position pointing to “12”. Now wind the film. Keep winding. You’ll need to wind much longer than you think before you get to the first frame. As you wind, you’ll eventually see a set of arrows pass across the red translucent window.

When you see this arrow, you’re almost at the first frame, so slow down your winding. Eventually you’ll see the number “1”. You’re now at the first frame. After you take a picture, wind until you see “2”. And so on until you reach frame 12 which is the last one.
Before you take your first photo, there are a few things you want to check. First, make sure the lens cap is off. Second, look at the bottom of the camera and you’ll see a tiny sliding switch with “N” on one side and “B” on the other. Make sure this is set to “N”.

Now focus your camera by twisting the lens barrel. The label that looks like the silhouette of a single person focuses the lens at approximately 3 to 4 feet, while the mountain label focuses on infinity. Every Holga focuses a little differently, so you’ll need to experiment to learn the nuances of your own particular camera.

With my camera, the mountain and single head settings are all that I need. If I’m taking a picture of something a few feet away, then I focus all the way in. Anything further than that, I’ve found very little difference between the intermediate focus settings and the mountains, so most of the time I just keep the camera set to infinity and adjust it only for close portraits.
I mentioned at the top that the Holga has a single aperture of about f13. That actually changed for newer models produced after 2010. There’s a small switch on the platform right above the lens barrel where you can select either cloudy or sunny. Keep it simple and leave this switch on the cloudy setting. It’ll let more light in, and even under really sunny conditions the picture will still turn out fine as long as you’re not using slide film.
To summarize: Lens cap off. Bottom switch to N. Focus. Then shoot.
To take a picture, simply push down and then release the black lever next the lens barrel with your right hand and you’ll hear a satisfying click. Keep the camera steady as you do this. Since the shutter speed is around 1/100, if you move too much while taking the photo, it will turn out blurry. Though we’re using a crappy camera, we still want to use good technique. After you take your picture, remember to wind your camera to the next frame.
At this point, you may be wondering about the viewfinder:

The viewfinder is a piece of junk that doesn’t work (shocking – I know), so don’t use it as a guide to compose your photos. It is useful to look through to get a sense of the field of view of the camera, but for actual framing purposes, just point the camera toward what you want to take a picture of and hit the shutter. You’re basically guessing, but after shooting the Holga for a while, you’ll get used to it and eventually learn the camera well enough to know with good confidence what the results will look like.
Once you’ve shot all 12 frames, continue winding the film advance knob and eventually you’ll feel the amount of resistance lessen and you will no longer see the film paper in the translucent red window. Pop the back off the camera off, carefully remove your completed roll of film, and secure it by lightly wetting the adhesive strip that wraps around the film roll and keeps it from unraveling.
Very important: do not throw away the empty film spool. You need to transfer this to the other side as a take-up spool when you’re ready for your next roll of film.
Congratulations! You’ve just shot your first Holga roll. Don’t be shocked if your first few attempts look like garbage. It takes some time to learn this camera, but if you stick with it and find good, interesting compositions to work with, your efforts will be well rewarded.

Keeping the camera together and light leaks:
In part one, I casually mentioned getting yourself a rubber band and some electrical tape to keep the camera together. Though it’s not absolutely required, I highly recommend doing this. If you drop the camera, which I’ve done plenty of times, sometimes the back plate will pop off. Any frames exposed to light will be ruined. No good. To minimize this risk, you can either take a thick rubber band (like the one that comes with an asparagus bunch) and wrap it around the camera, or you can take a few pieces of electrical tape and secure the back plate to the camera body in multiple places. I prefer the electrical tape because it’s more secure. An added bonus is that doing this will make your camera look like an even bigger piece of garbage, thus deterring thieves from targeting your gear.
If you read some older articles about Holgas, you’ll also find that many of the pre-2010 models had a problem with light leaks getting into the camera. I’ve owned 3 Holgas since 2010, and none of them leaked any light, so I think this issue has been addressed. If you do get a camera that leaks light, you’ll notice areas of overexposure (bright streaks) consistently in the same place in all your photos. If that’s the case, sealing up the back of your camera with electrical tape should fix that right up.
Bulb mode:
The switch on the bottom of the camera gives you two choices: N and B. N (normal mode) is what you’ll want most of the time and gives you a shutter speed of approximately 1/100 of a second. B stands for bulb mode. If you slide the switch to bulb, the the shutter will stay open for as long as you have your finger pushing down on the shutter release. The only time you would want to use this is in low light where you’re attempting to get a long exposure shot; however, if you’re planning on doing this, you must have either a tripod or place the camera on a flat, steady surface where it won’t move; otherwise, the camera will shake and you’ll get a blurry photo. I’ve experimented some with bulb mode with unimpressive results. I don’t even fool with it anymore, but if you’re feeling artsy or are somewhere where you have no choice but to take a picture in dark conditions, then by all means give it a try. If I’m ever in the dark, I put the Holga away and use my digital camera. It’s just easier.
How to process the film:
If I shoot color, I send it to Dwaynes Photo in Kansas. I’ve been happy with their film processing, but don’t bother with their scans which are terrible. The colors are usually off, and for some reason the scans are done at a really low resolution. I’ve called them a few times about this since it takes a few mouse clicks to change the resolution settings to something usable, but they refuse to help.
Once I get the negatives back, I scan them to my computer using my Epson V500 scanner. They don’t make this model anymore, but the Epson V600 is the new and improved version. If you decide to buy a scanner, make sure it has the capability to scan medium format negatives. Most consumer level scanners are not able to do this, so do your research before you buy.
If I shoot black and white, I process the negatives on my own. If you’re learning how to use the Holga, I actually recommend starting with black and white and developing your own film because you’ll get the results faster and have a better sense of what worked and what didn’t. It’s also a really interesting process if you’ve never developed film before. I won’t be going into the details in this post, but here’s a link to my own B&W development recipe.
For black and white, you do not need a darkroom with all the cool red lights and such. All you need are a few supplies that can all be bought from B&H Photo’s website. Over the years I’ve come to prefer color film when shooting my Holga, so I don’t even shoot black and white anymore and sold off all my film developing equipment. But starting off with black and white was a good choice, and I do think I learned a lot more about using the Holga by doing so.
Thanks for reading, and if this camera interests you, you can find it either at B&H Photo or on Amazon along with film and all the miscellaneous accessories that go along with it.

I had a Holga GFN about 8 years ago, and left it in the empty house when I moved out. I think I only shot one roll of film through it, and was so angered and frustrated at the lack of control, that I gave up on it. Since then I have used many medium format and large format films and equipment, including a Moscow 5, two Lubitels, several 6×9 plate and roll film cameras, a 4×5 Press camera, and a few Yashica TLR and a couple 120 box cameras.
I do my own B&W processing, and scanning, as well as color film processing using the Unicolor press kit. I even process my 4×5 color and B&W in my 2 reel Paterson tank.
I just ordered another Holga, which I promised that I would never do, LOL , a 120 N
Now that I have much more experience with different lenses, films and controls available, I can now appreciate the simplistic and by chance, atmosphere, that using a Holga can impart on the process.
I have missed MANY shots with film, because I was busy making sure the focus, and exposure are spot on.
Using the Holga, one is freed from such hesitation or concern. Take the shot. Don’t worry about it, just shoot!
LikeLike
This isn’t a beginner’s camera for sure. I wouldn’t have felt comfortable shooting a Holga until I was very familiar with using a more traditional camera and getting a good understanding of how light, aperture, and shutter speed affect the final outcome. Good luck with the new Holga; I hear that the standard model with the plastic lens is actually better than the one with the glass.
LikeLike