One of the first things that I do whenever I go on a group tour is locate a competent photographer. I previously wrote some tips on how to do this, and the trend held during my recent time in Egypt. It’s important to find out who these people are early on, because this can make a huge difference in the quality of the pictures you’ll get of you and your travel companions posing in front of various scenes. You’d think that with the proliferation of smart phones that most people, through lots of practice, would eventually learn how to compose a decent photograph, but that’s sadly not the case.
So here are a handful of tips to take a solid photo on vacation if someone hands you a camera and asks you to snap a picture of them.
1) Focus your composition primarily on the scene; not the person. I cannot count the number of times that I have asked a person to take a picture of me in front of a stunning scene, and what I end up with is a photo with me smack in the middle of the frame, the plain dirt ground filling up the entire bottom half of the photo, and a significant portion of the cool scenery not even in the picture. Or a photo that is so zoomed in on my upper body that there’s very little frame of reference as to where I’m even at.
Here’s an example from Mexico. This is one of the very few pictures I have illustrating this, since I usually delete these pieces of crap immediately after they’re taken and ask a different person to re-do the picture.
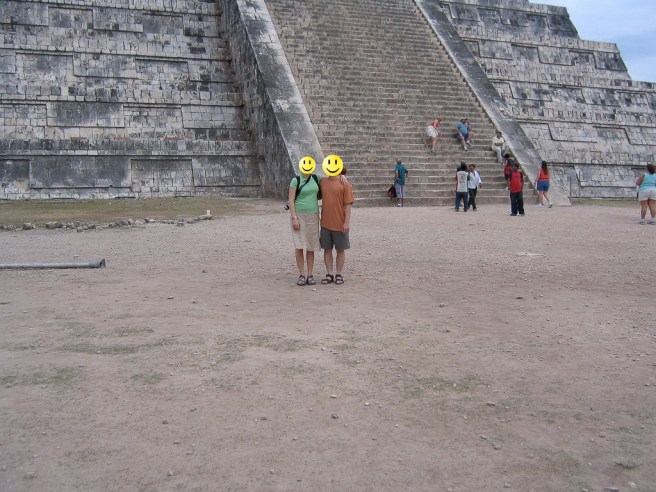
Just look at that piece of garbage. The bottom two-thirds of the frame is nothing but a bunch of boring dirt, and the important part of the scenery – the pyramid in the background – is a mere afterthought. The person who took this photo gave no thought to composition whatsoever. Simply atrocious.
Here’s another example:
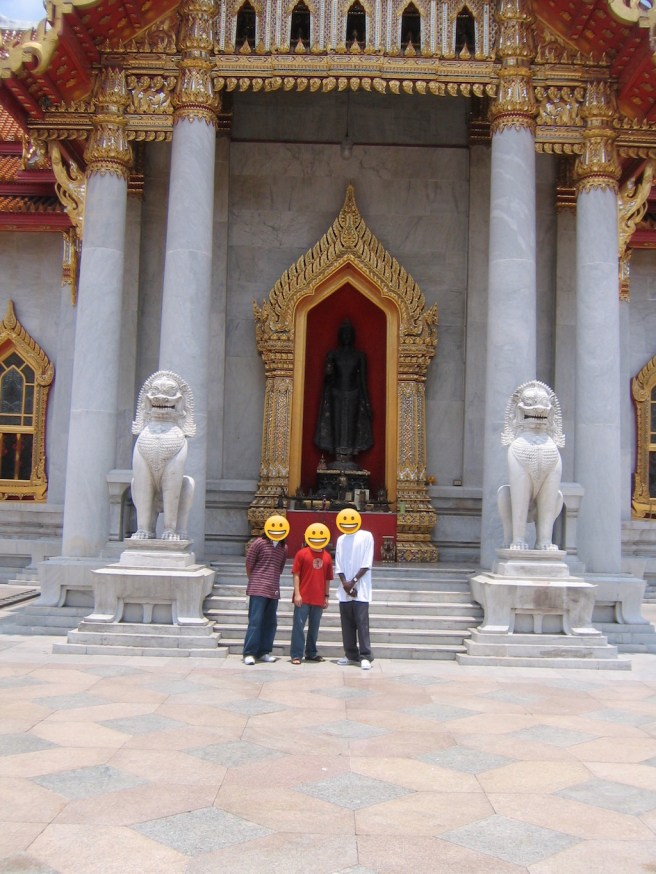
This is a completely imbalanced picture with way too much empty space below our feet and a large portion of the interesting architecture behind us is cut off. Had the person angled the camera up a little bit, he could have easily gotten the top of the building in the frame. Also, it’s very crooked. I don’t remember, but I wouldn’t be surprised if the random guy we asked to take our picture shot this one handed with no effort whatsoever.
In contrast to the above, the following two photos were taken by two of the best picture takers I’ve met so far during my travels (special shout out to Kate & Cresence for taking all the fantastic pictures).
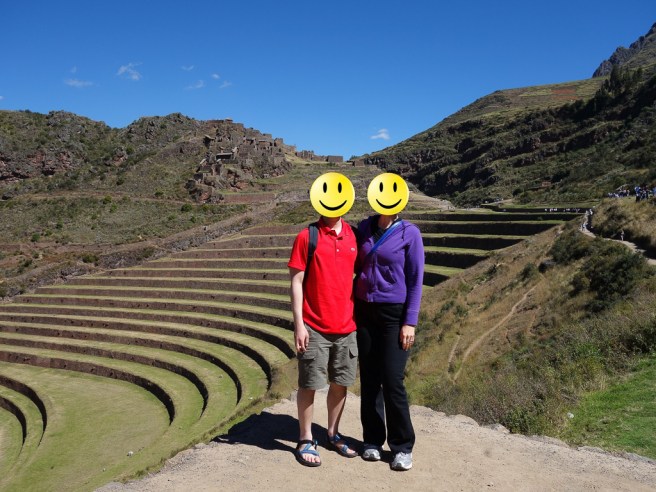
This is a perfectly good picture. Our entire bodies are included, it’s very clear where we’re at, and the background is nicely balanced with just the right amount of ground and sky in the frame. Good stuff.
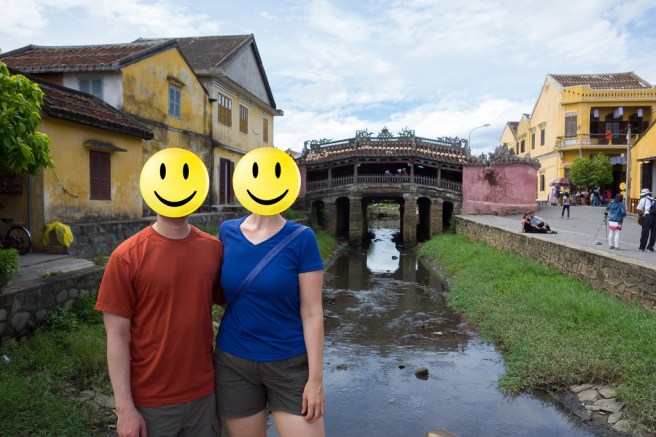
Another fine picture. The subjects (us) are a little off center so we’re not obstructing the background, but we’re not too far at the edge of the frame, and the famous Hoi-An bridge and colorful buildings are clearly visible. The overall proportions of the various elements in the photo are pleasing.
When composing a picture, don’t be afraid to move your body around. Take a few steps to either side if necessary to get all the elements of the picture in the right place, and sometimes you may even want to crouch closer to the ground to get the proper angle.
2) Use both hands. Unless you’re outside in the middle of a bright, sunny day, taking a one handed photo will often result in a blurry or crooked shot. Use both of your hands to stabilize the camera/phone so it doesn’t shake.
3) Ask the person if they’d like their feet in the picture. Not everyone is very particular about this, but this is something that bothers me. To me, a photo showing just a person’s upper body is fine. A photo showing the entire person is fine. Photos that show the entire person right up to the ankle and then abruptly cut off the feet look a little odd. If you’re getting 95% of the person’s body within the frame, then you can likely take a step back and get the remainder of their lower appendages in the shot as well.
And one big tip for the person who is requesting that his photo be taken: consider handing them your cell phone instead of your real camera. Any smartphone camera made within the last few years is pretty idiot proof. A nice expensive camera with a big fancy lens makes phenomenal images if the person pressing the shutter actually knows what they’re doing. Most people don’t. This is especially important if you have a camera with an odd lens; on a recent trip, I offered to take someone’s picture, and she handed me her DSLR that had an ultra wide angle lens – a specialty lens that requires a lot of practice to shoot well. I know my way around a camera, but I’ve never shot with an ultra wide and probably would have taken a better picture with an iPhone. It’s better to get an in-focus picture with good composition using a cell phone than to get an out-of-focus or poorly composed picture with a DSLR. And unless you make large prints, which most people do not, the end result won’t be that much different.
Though you can’t do anything about the skills of other people taking your picture, if you’re looking for ways to improve the appearance of your own photography, one resource that I’ve found very useful is the book Pictorial Composition by Henry Rankin Poore. It’s inexpensive and easily found on Amazon. This book isn’t even about photography specifically – it’s for artists who draw and paint – but the principles apply to any type of visual art, and understanding and incorporating those techniques will result in a much bigger improvement in your work than buying a more expensive camera.
